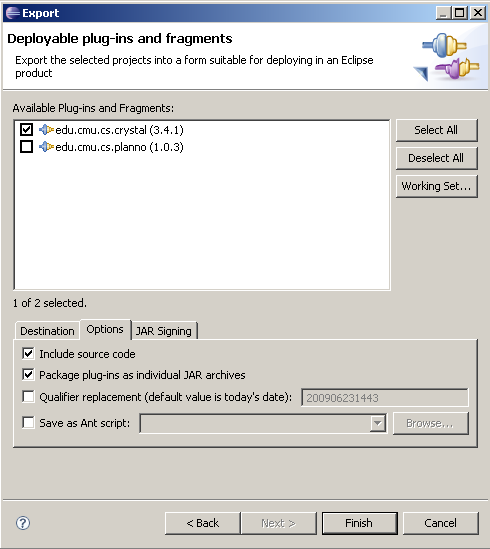
Symptom: You create an update site for your plugin, but when you do it does not include source code for your plugin, or alternatively you'd like to but haven't figured out how. The most frustrating thing that I encountered was that, while a regular "Export"-style plugin deployment would work (wherein you right-click on your project, select "Export," go to "Deployable Plug-ins and Fragments" and then be sure to check "Include Source Code", image 1) the JAR file that was getting created for the purposes of the Update Site would not include any source. This was verified by examining the JAR files produced by each mechanism with WinZip.
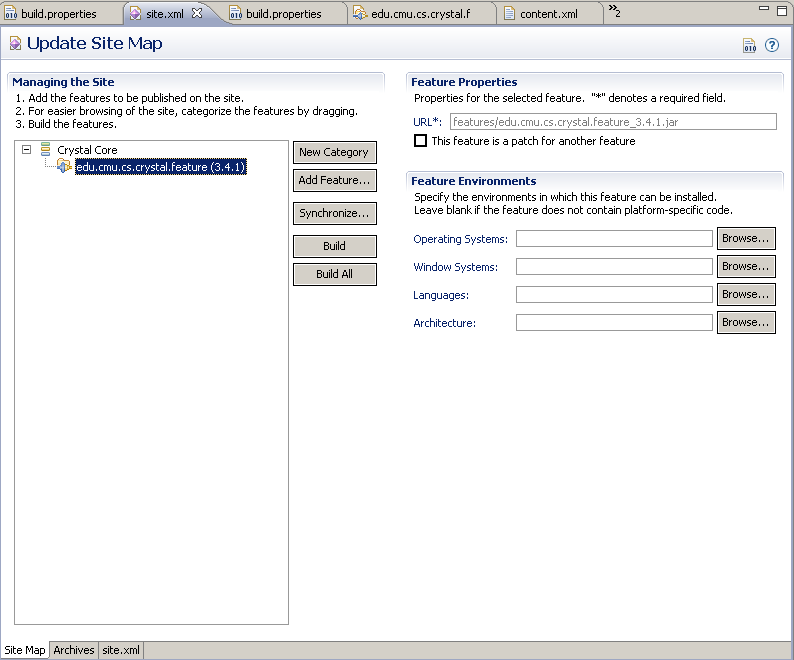
Solution: The most important thing to realize, I guess, is that the options offered to you in the standard "Update Site Build" screen (image 2) are not everything that is available. Here's how I made this work:
- First, I am assuming you have three projects, your plugin project, your feature project, and your update site project.
- In the Feature project, the only thing that seemed important was that I had to uncheck "Unpack the plug-in archive after the installation" on the "Plug-ins" tab. It did not work with this tab checked. (You do have to set up the feature normally, but I am omiting those details, since they are standard.)
- In the Update Site project, add a category and add your feature, as shown in image 2, and as you'd expect to do. However, don't bother hitting "Build" or "Build All." They will only get you a source-free plugin.
- Right-click on your feature project, select "Export..." and then select "Deployable Features." Now here are all the options we are looking for! (Image 3)
- You need to select a place for all this stuff to go, but choosing the directory export option, and choosing your update site project seems to be the best bet.
- Choose "Include Source Code," and also you want to package as individual JARs and include metadata. This will generate the archive.xml and contents.xml files we need for the update site!
- I also saved an ANT file, so I could automate this in the future, for when I am ready to make my next release.
- It will do a bunch of building stuff, but basically you're done!
 So yeah, I found this whole process to be pretty easy once I figured it out, but very poorly documented! Now programmers who write static analyses that extend the Crystal framework can see the source and the documentation for the files they are using. Awesome!
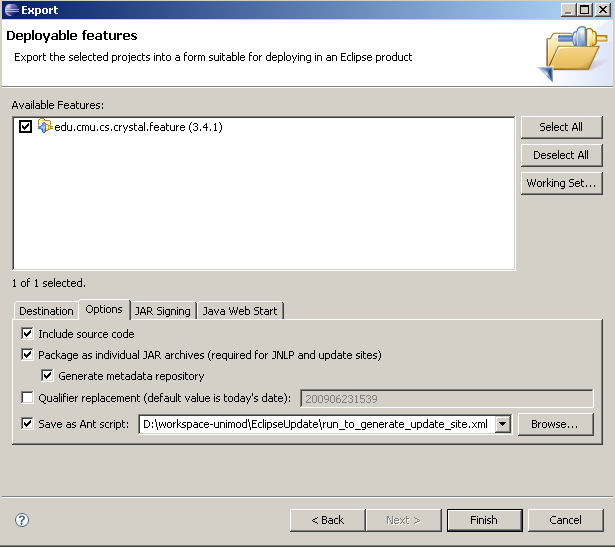
No comments:
Post a Comment